-
Open the Atlassian developer console
Head over to developer.atlassian.com/console/myapps/ and sign in with the Atlassian account you want the integration to belong to.
-
Create a new OAuth 2.0 integration
In the top-left corner, pick the workspace (development space) you'd like the integration to live in. Then click Create on the right and choose OAuth 2.0 integration from the menu.
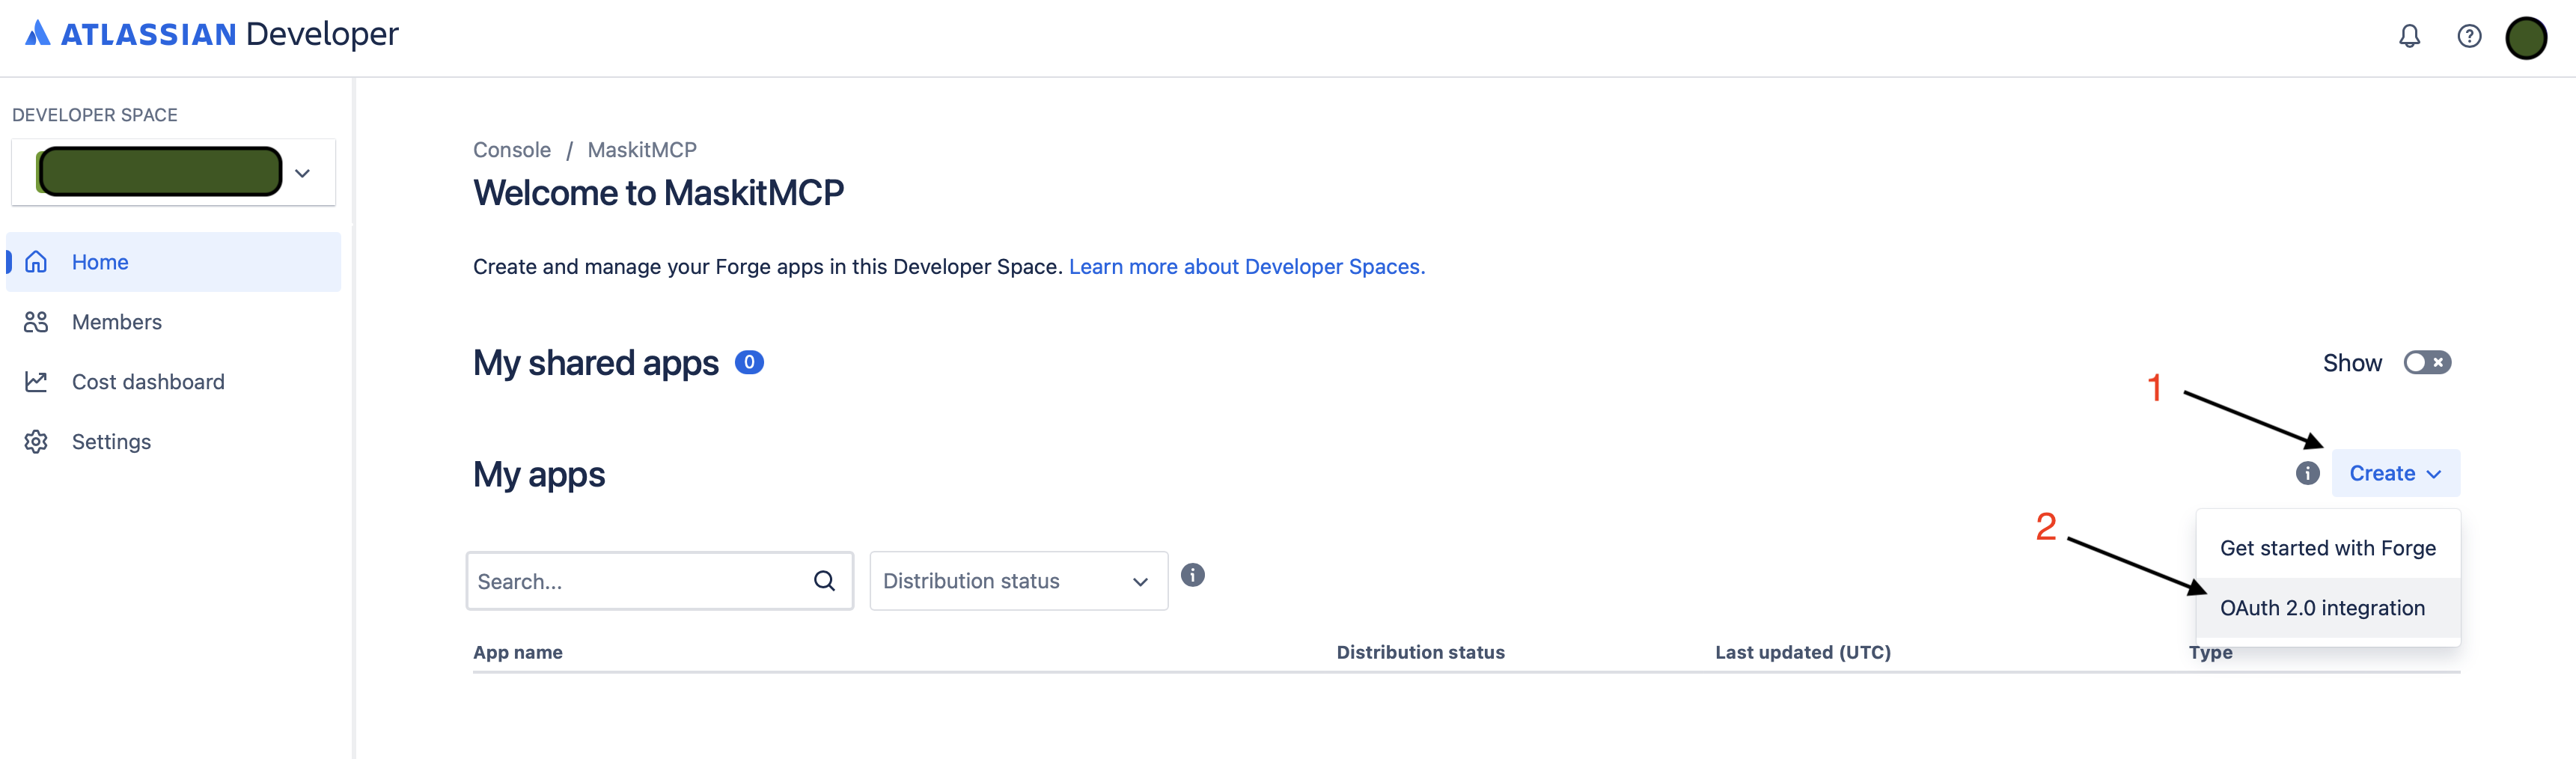
Pick "OAuth 2.0 integration" — not the other app types. -
Name your integration
Give it any name you'd like (e.g.
MyOpenMaskit) and confirm. Atlassian creates the integration and drops you back on its detail page inside the developer console. -
Configure the OAuth callback URL
In the left sidebar, open Authorization. You'll see a row labeled OAuth 2.0 (3LO). Click Configure on the right (or Add if you haven't set it up before).
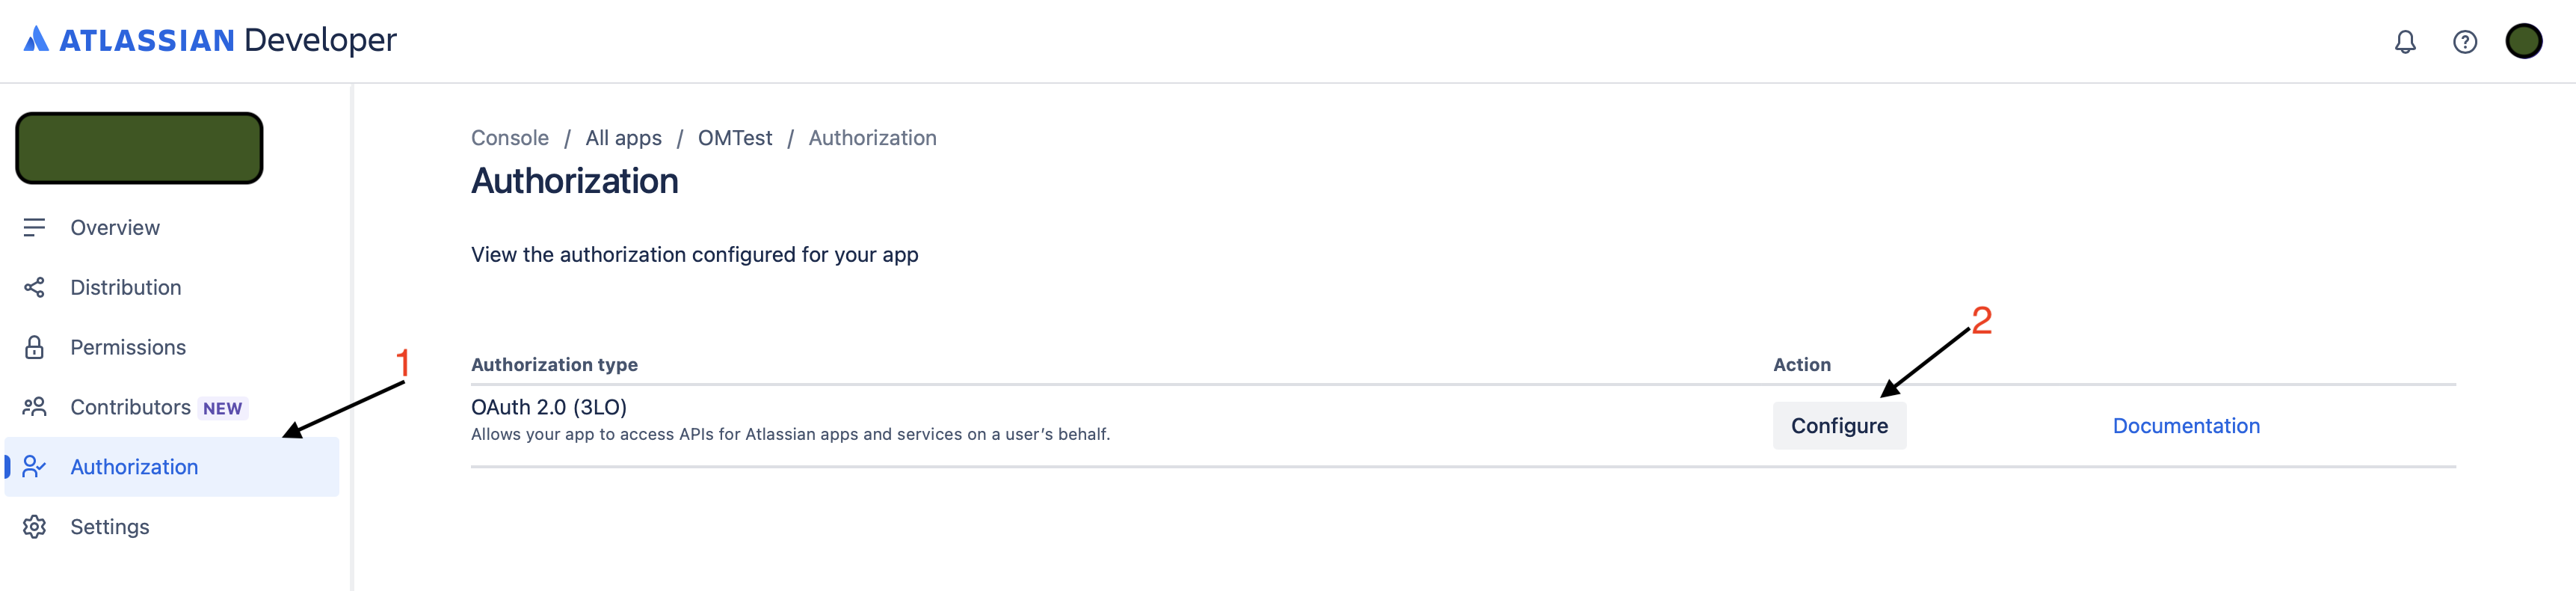
The OAuth 2.0 (3LO) row is the one OpenMaskit's flow uses. In the Callback URL field, paste:
http://localhost:9473/oauth/callback/jiraThen click Save changes. The URL must match exactly — the OpenMaskit dashboard receives the OAuth callback at this path. The install modal also displays this URL for you to copy.
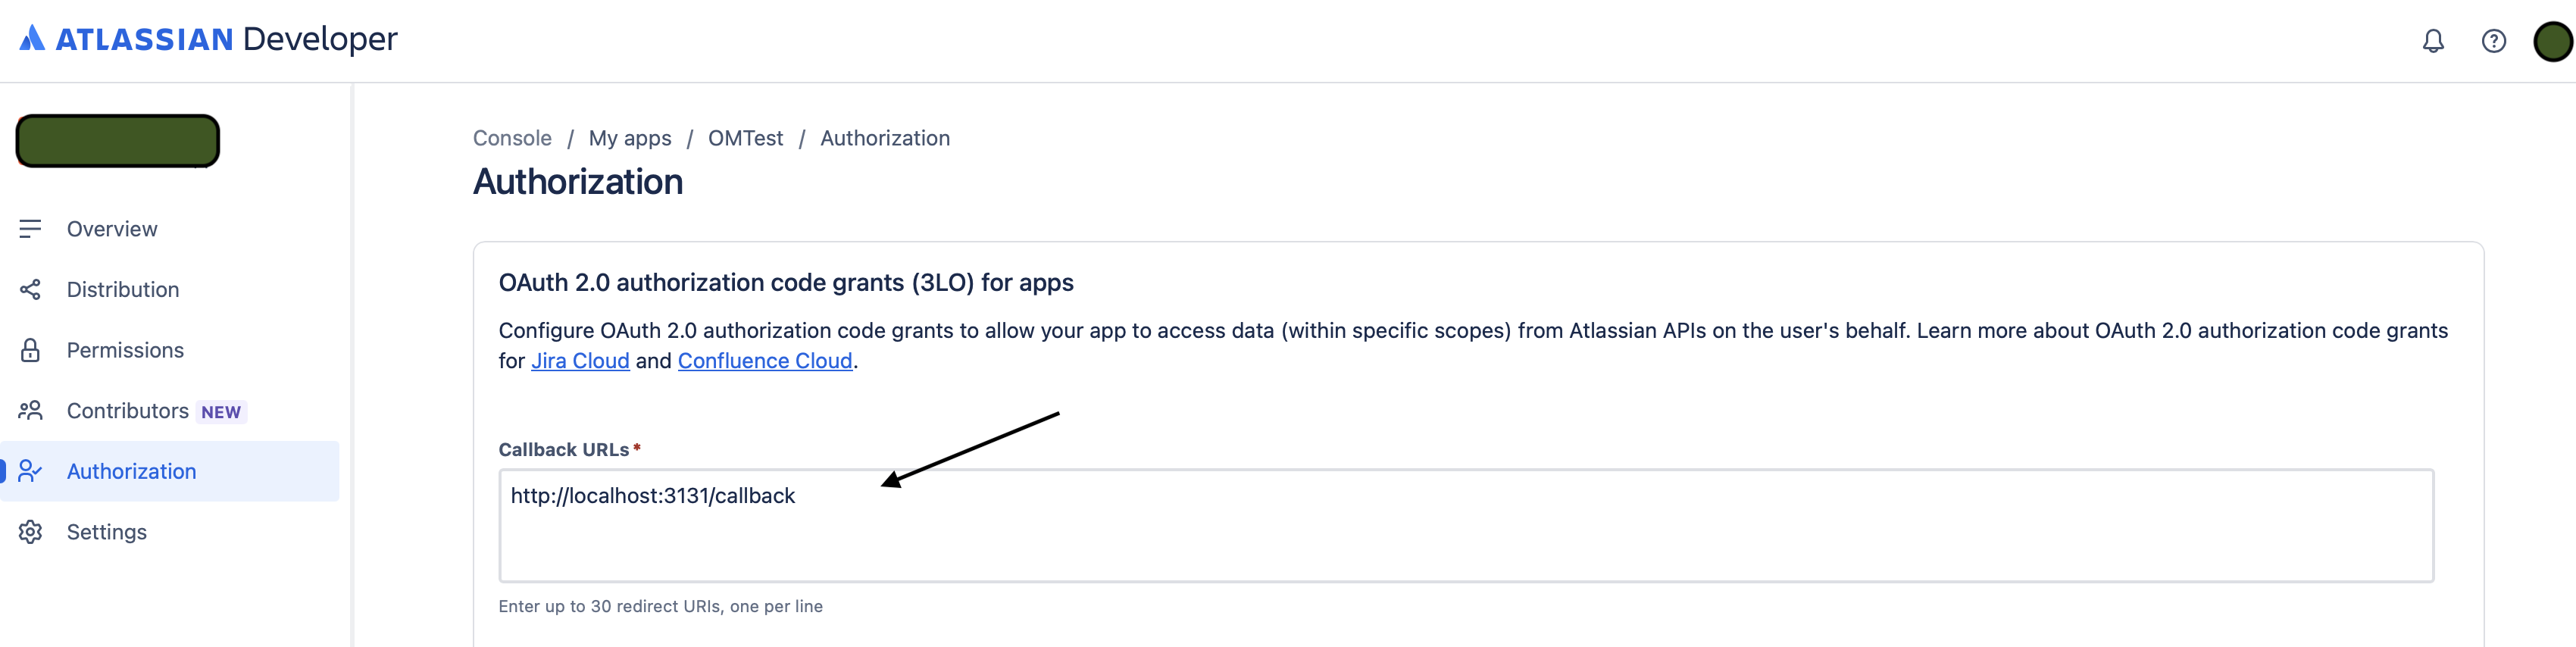
Paste the callback URL exactly as shown — port and path both matter. -
Add the API permissions
In the left sidebar, open Permissions. For the Jira MCP server you'll want to add the Jira API, the Confluence API, and the User identity API. For each one, click Add, then Configure, and tick the scopes you want to grant.
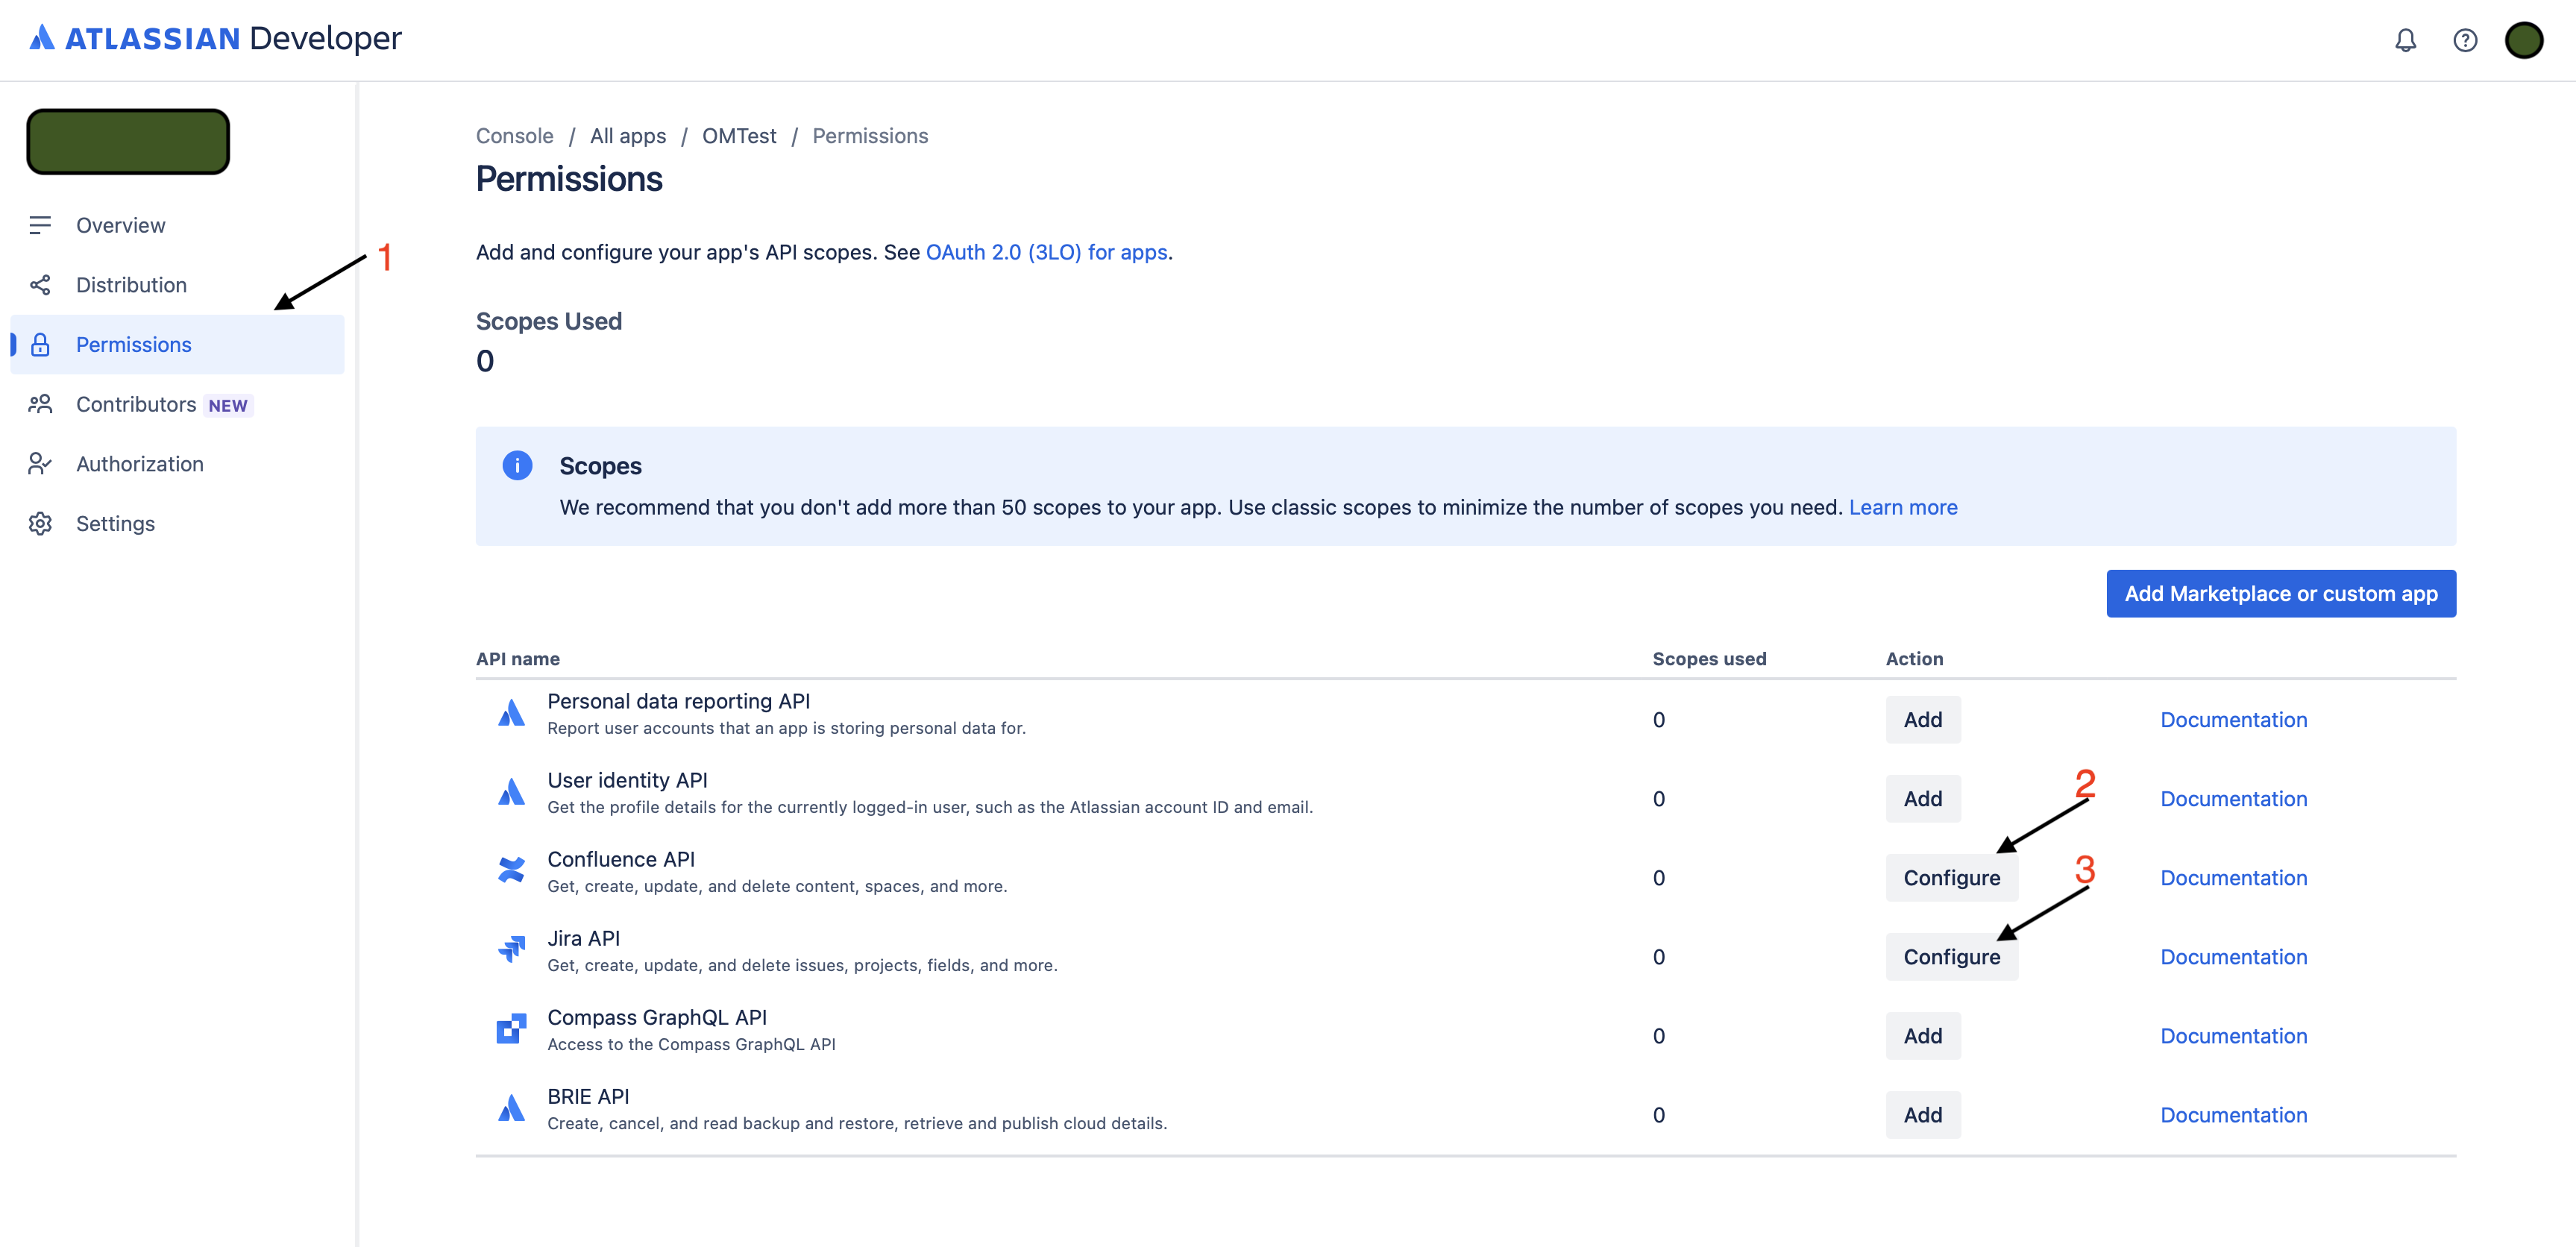
Without at least one scope here, the OAuth flow completes but no tools are usable. -
Copy the Client ID and Client Secret
In the left sidebar, open Settings. Scroll to Authentication details — that's where your
Client IDandSecretlive (click the eye icon to reveal the secret).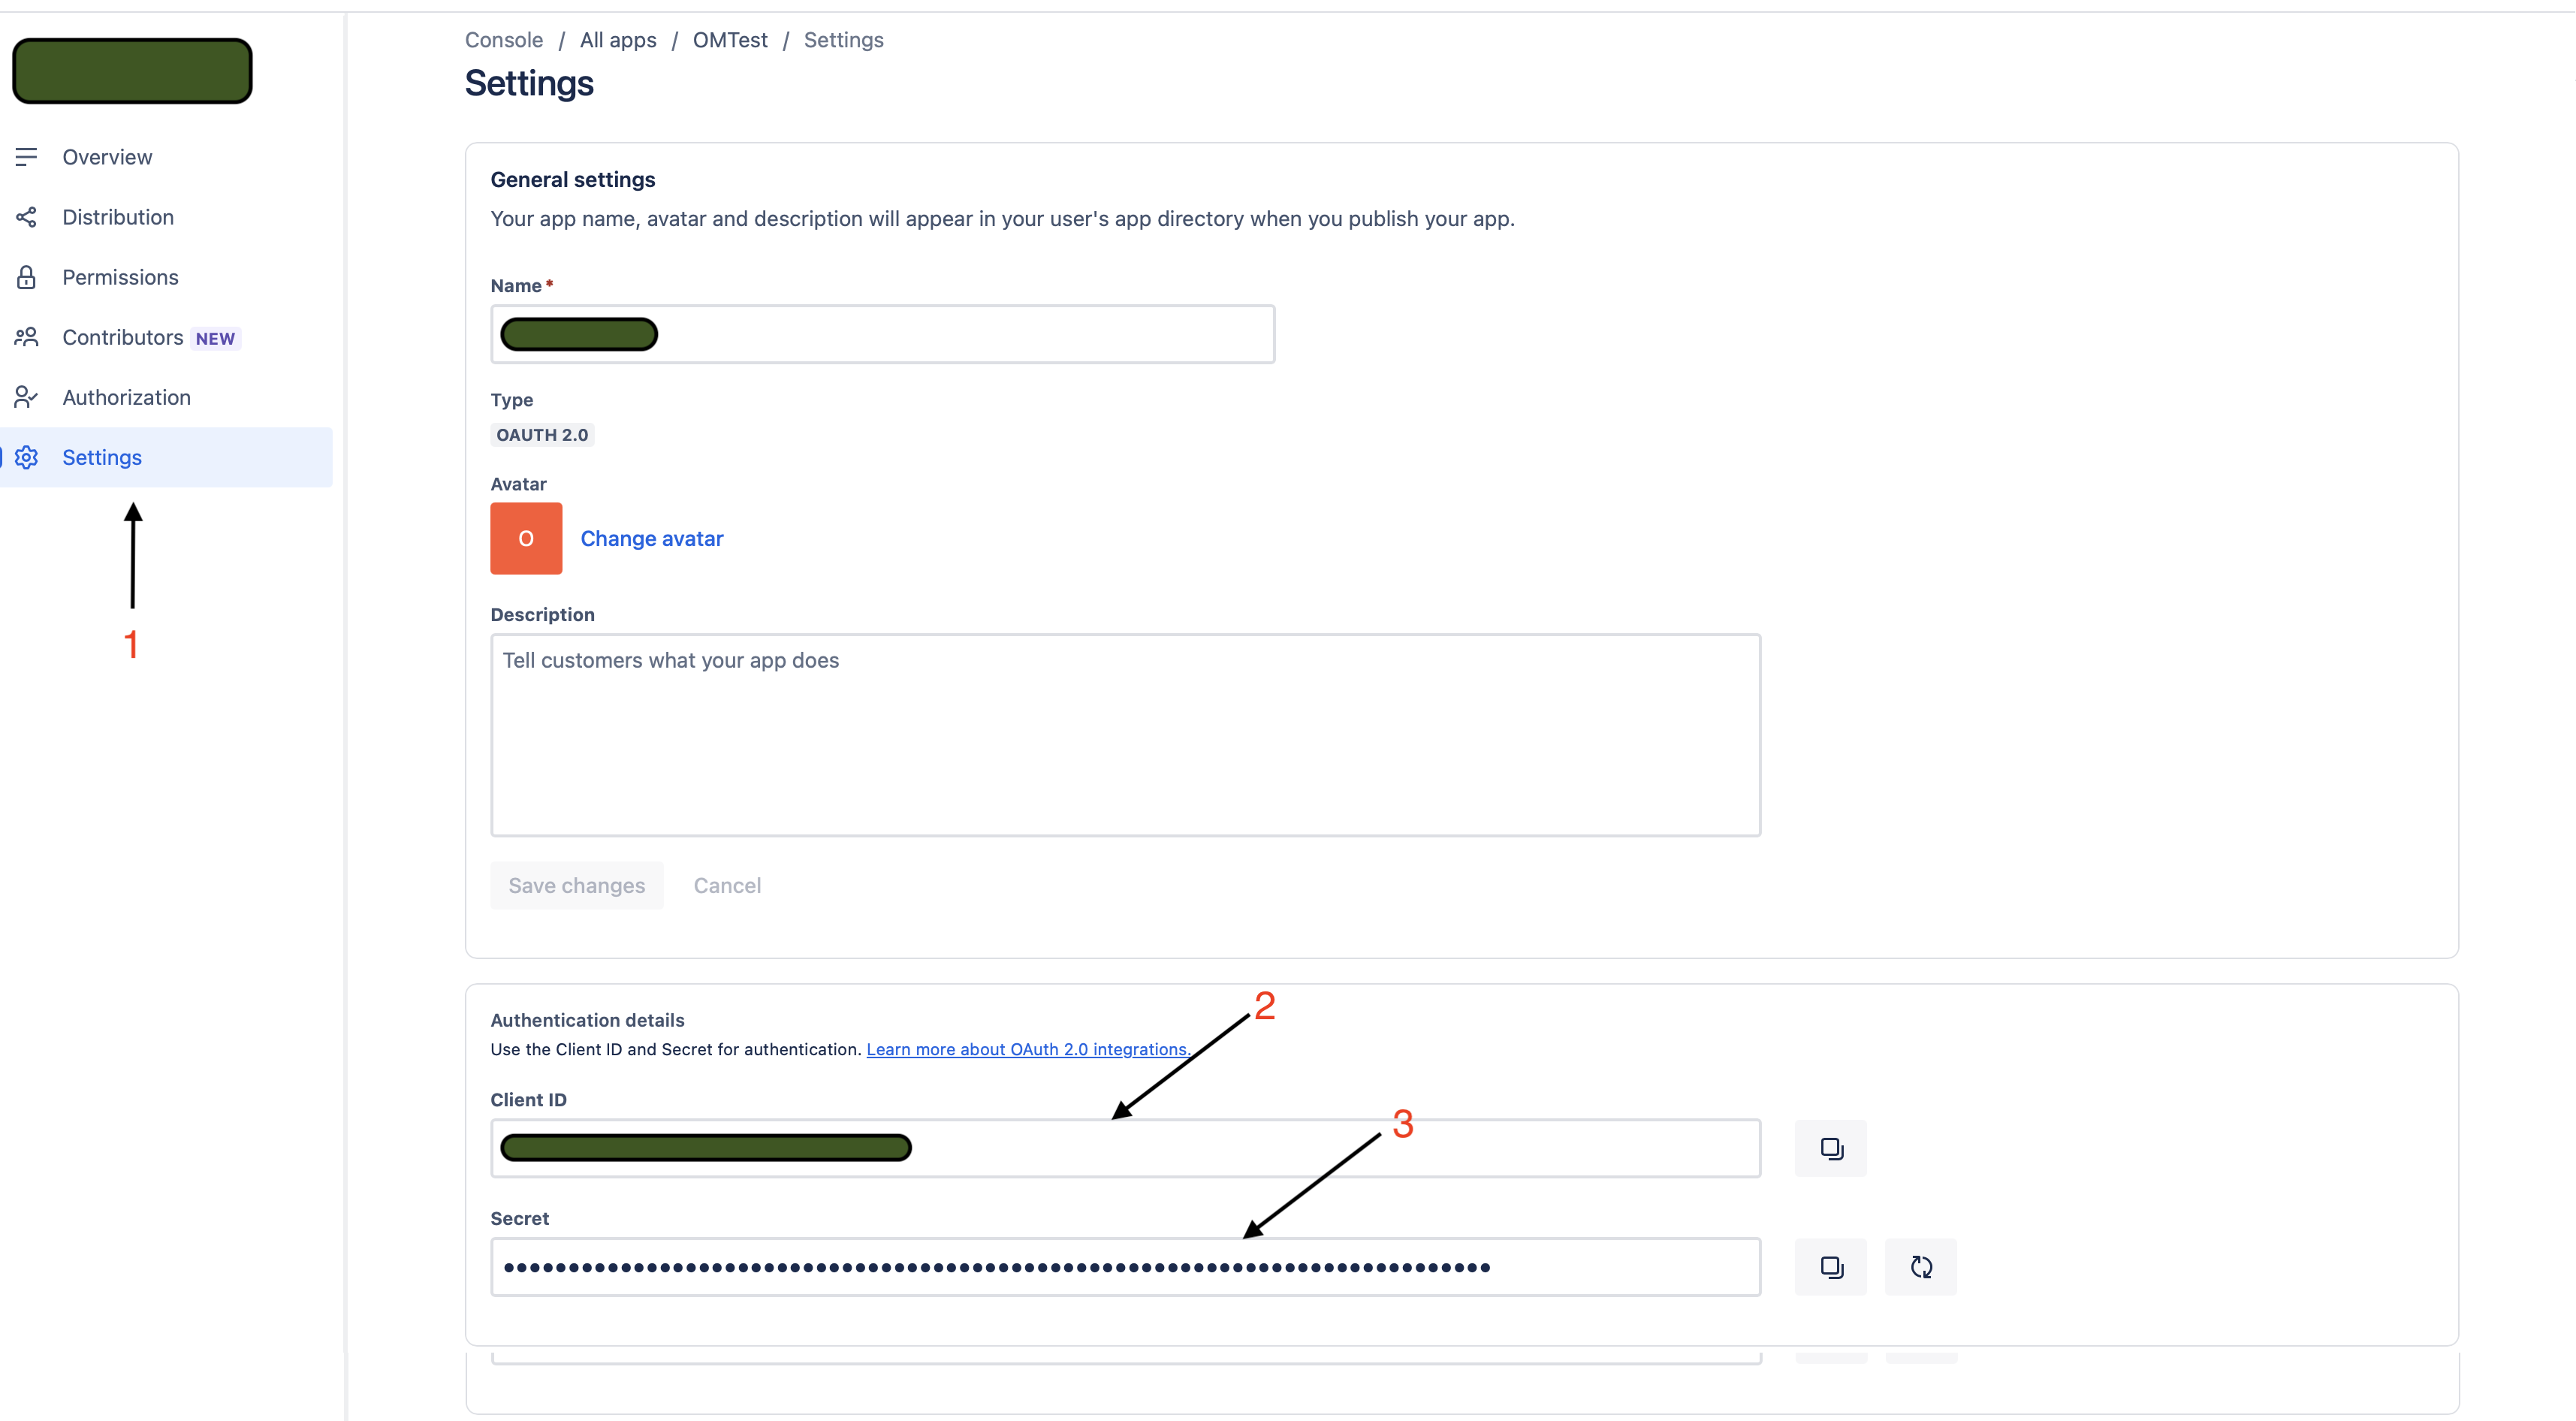
These two values are everything OpenMaskit needs to authorize your Atlassian account. -
Paste them into OpenMaskit
Back in the OpenMaskit dashboard, install Jira from the marketplace, paste the Client ID and Client Secret into the install modal, and authorize. Atlassian will prompt you to grant access to the sites you choose — accept, and you're connected.
That's it.
Your Client ID and Client Secret live in your OpenMaskit store directory, encrypted at rest. You can revoke the integration at any time from the Atlassian developer console, or hit Re-authorize on the OpenMaskit server card to start a fresh OAuth round-trip.